Preparation checklist
AI-generated checklist of what to prepare before submitting a bid.
After uploading your RFP documents, the platform can generate a preparation checklist — an AI-generated list of everything you need to prepare before submitting a bid. Think of it as a readiness roadmap that the AI builds by reading your requirements.
How to generate a checklist
Click Prep Checklist in the sidebar workflow. If your RFP documents are ready, you'll see a Generate Checklist button. Click it and the AI reads your RFP documents and produces a structured list of preparation items, organized by category.
You can also trigger checklist generation from the Overview page via the actions menu.
Generating a preparation checklist is free — it doesn't cost any credits.
Reading the checklist
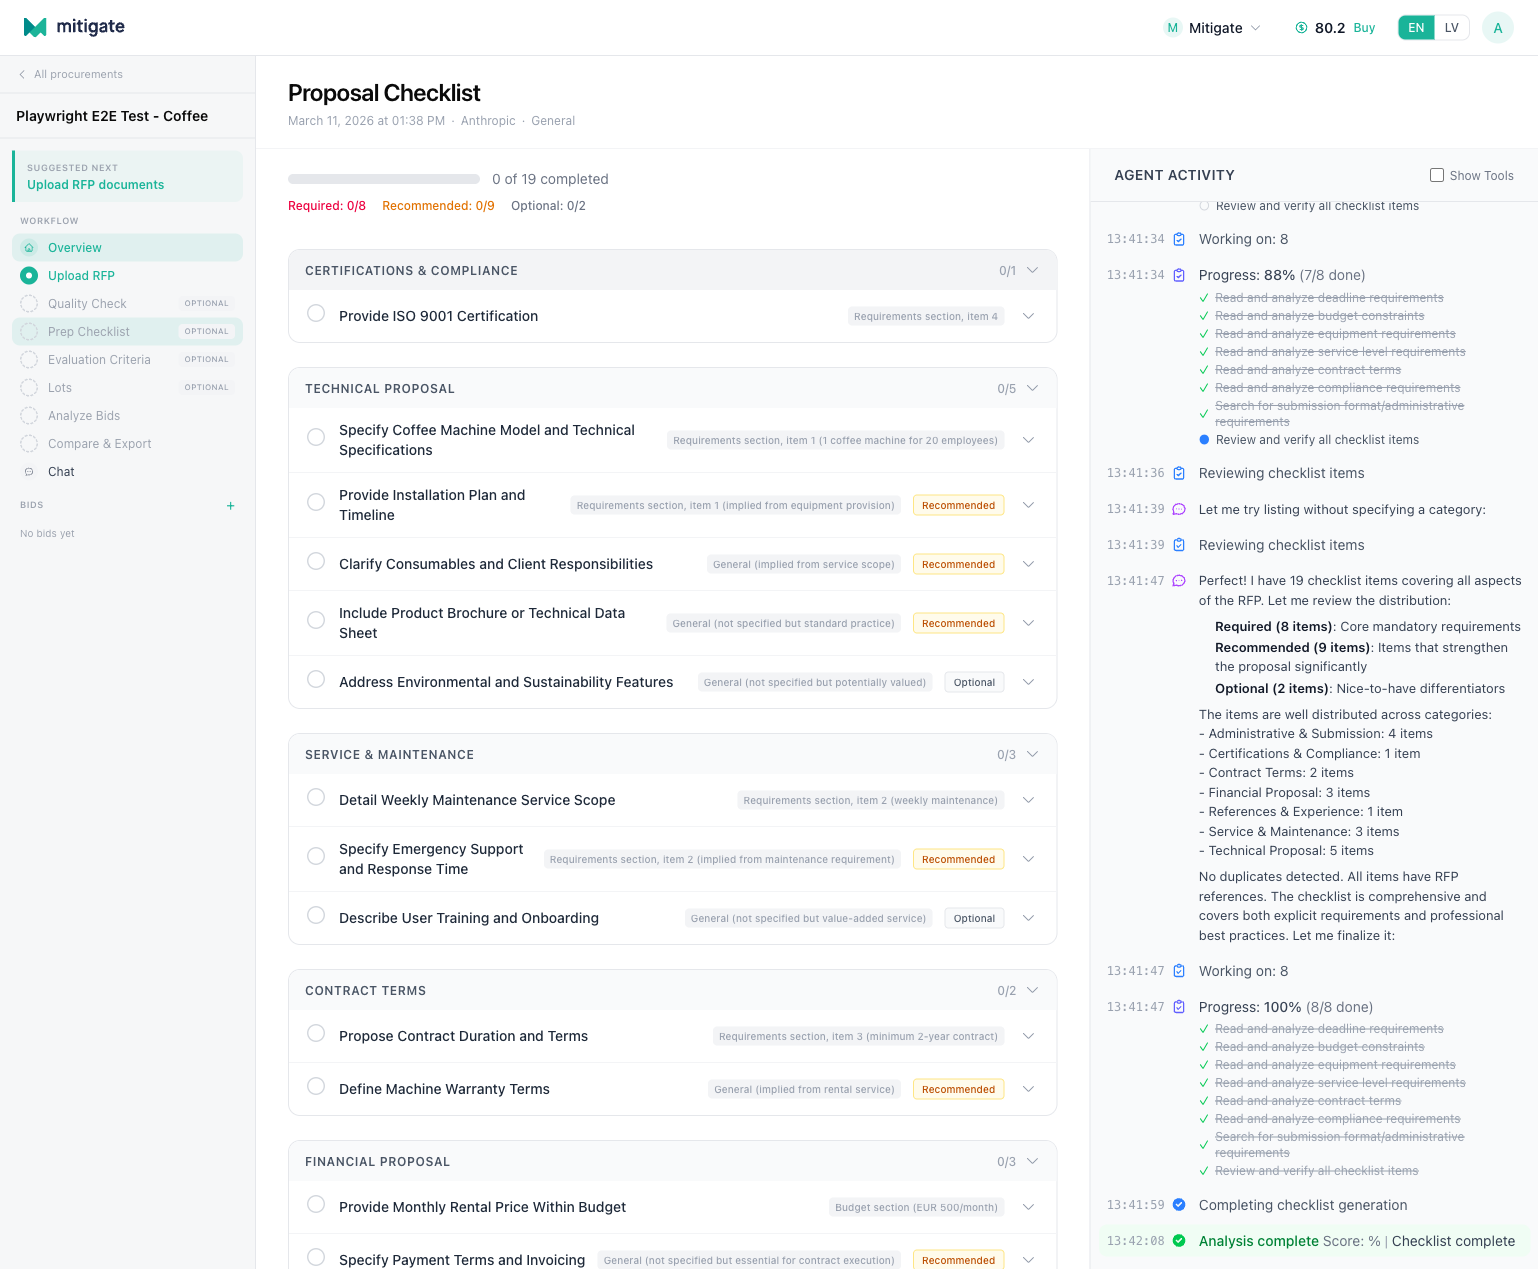
The checklist page has a two-panel layout: the checklist items on the left and the agent activity feed on the right.
Priority breakdown header
At the top you'll see a summary showing how many items fall into each priority level and your completion progress:
| Priority | Color | Meaning |
|---|---|---|
| Required | Red | Must be done before submission. Missing these means non-compliance. |
| Recommended | Yellow | Strongly suggested. Skipping these weakens your bid. |
| Optional | Green | Nice to have. Include if time permits. |
Category cards
Items are grouped into collapsible category cards (e.g., "Certifications & Compliance", "Technical Proposal", "Service & Maintenance", "Contract Terms"). Each card shows:
- The category name
- How many items it contains
- Progress indicator — how many you've marked as done
Click a card to expand or collapse it and see its items.
Item details
Each checklist item has:
- Checkbox — mark it as done
- Title — what you need to prepare
- Priority badge — required, recommended, or optional
- Progress bar — shows completion status visually
- Description — more detail on what's expected (expand the item to see this)
- RFP reference — where in the RFP this requirement comes from
Using the checklist
Marking items done
Click the checkbox next to any item to mark it as completed. Your progress is saved automatically. The progress indicators in the category cards and the priority breakdown header update in real time.
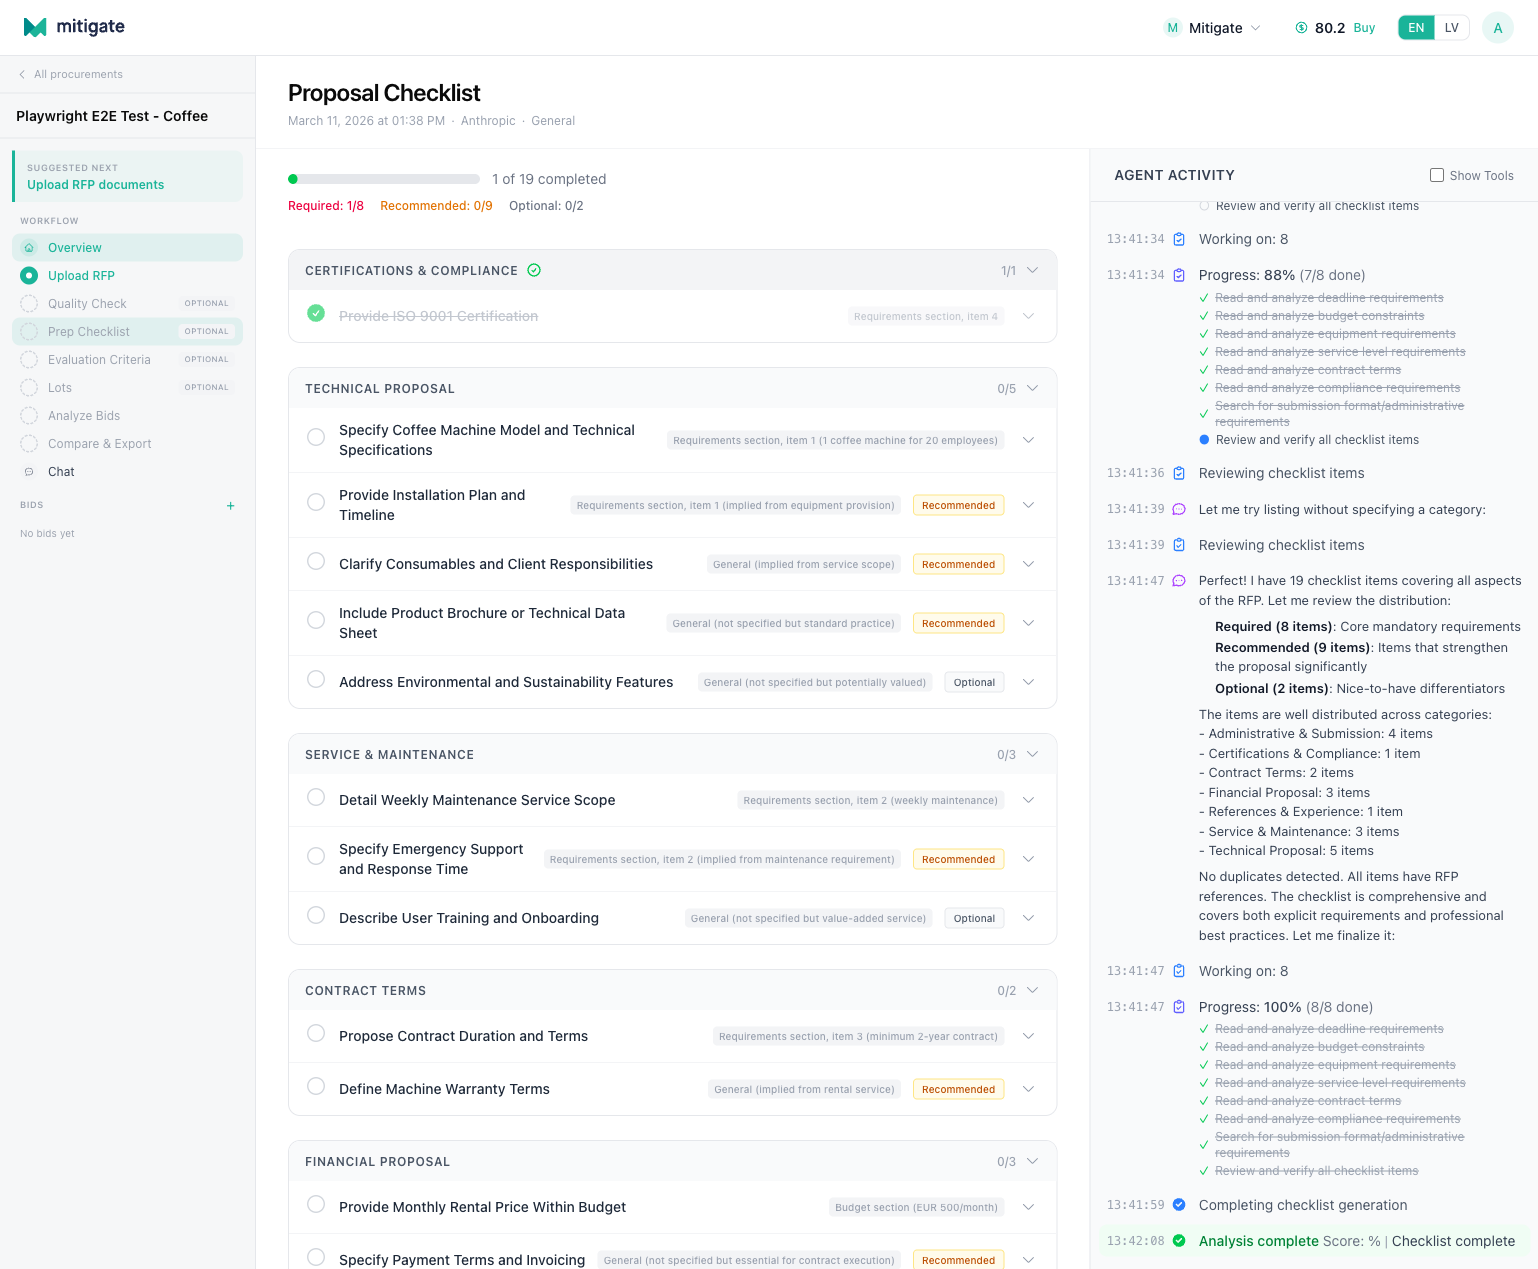
Tracking progress
The priority breakdown header at the top gives you a quick overview:
- How many required items are done vs. total
- How many recommended items are done vs. total
- How many optional items are done vs. total
This helps you focus — get all required items done first, then work through recommended, and finally optional if you have time.
When all items are complete, the sidebar shows a green checkmark next to "Prep Checklist".
Tips
- Start with required items. These are non-negotiable. If you miss a required item, your bid may be rejected outright.
- Use the RFP references. Each item points back to the relevant section of your RFP. If an item seems unclear, read the original requirement.
- Generate early. Run the checklist as soon as your RFP documents are uploaded, not the day before the deadline.
- Share with your team. Everyone in the organization can see the checklist and mark items as done.